Hi scrappy friends! Today I am sharing another Project Life vacation layout with you, which documents a trip we took to Florida in mid-January. I've blogged in the past about my approach to documenting vacations within my PL album, so I won't go into too much detail about my process, but you can find those previous posts here and here.
Throughout the layout I combined products from the Crate Paper "Oasis" collection, as well as some printed digital cards from the Project Mouse "Beginnings" collection which you can find here.
Here's the left page...
The "Florida" above was stamped with the Crate Paper Oasis alpha stamps. I'm so glad I picked those up, they are a great font and size for Project Life! The "vacation" gold puffy word is also from the Oasis collection. I used so many of these words throughout the layout!
The "fly" tag above was cut out of the vellum sheet from the Oasis collection. Gold foil on vellum? Yes please!!! I stitched it in place with some gold thread, and just added a simple cluster of enamel dots and a tiny chipboard plane.
The "magic" card above is from the Project Mouse set. I printed a handful of these cards on photo paper so the colors are really crisp, and just added a few stickers for dimension.
And now onto the inserts...
For each insert, I trimmed a 12" page protector down to 8" wide (plus the margin). Down that binding edge, I added a strip of paper from the Oasis collection (this has a cute tropical postage stamps pattern) and folded it over the edge so there was a row of stamps on each side, and then stitched it in place with gold thread. I punched holes to align with my album rings and voila!
Here is the front of the first insert, which documents more of our time in Daytona Beach...
For a couple of the inserts I added a confetti pocket, because.... well, why not!?!
Using a die set from Kaisercraft, I punched tropical leaves from cardstock and vellum, and added them to one of the pockets, along with some sequins. The white & clear sequins are from Nicole Petersen Designs. The tiny pink glitter is from the dollar spot at Target. To finish it, I sealed the edge with my Fuse tool. Adorable, right!?!
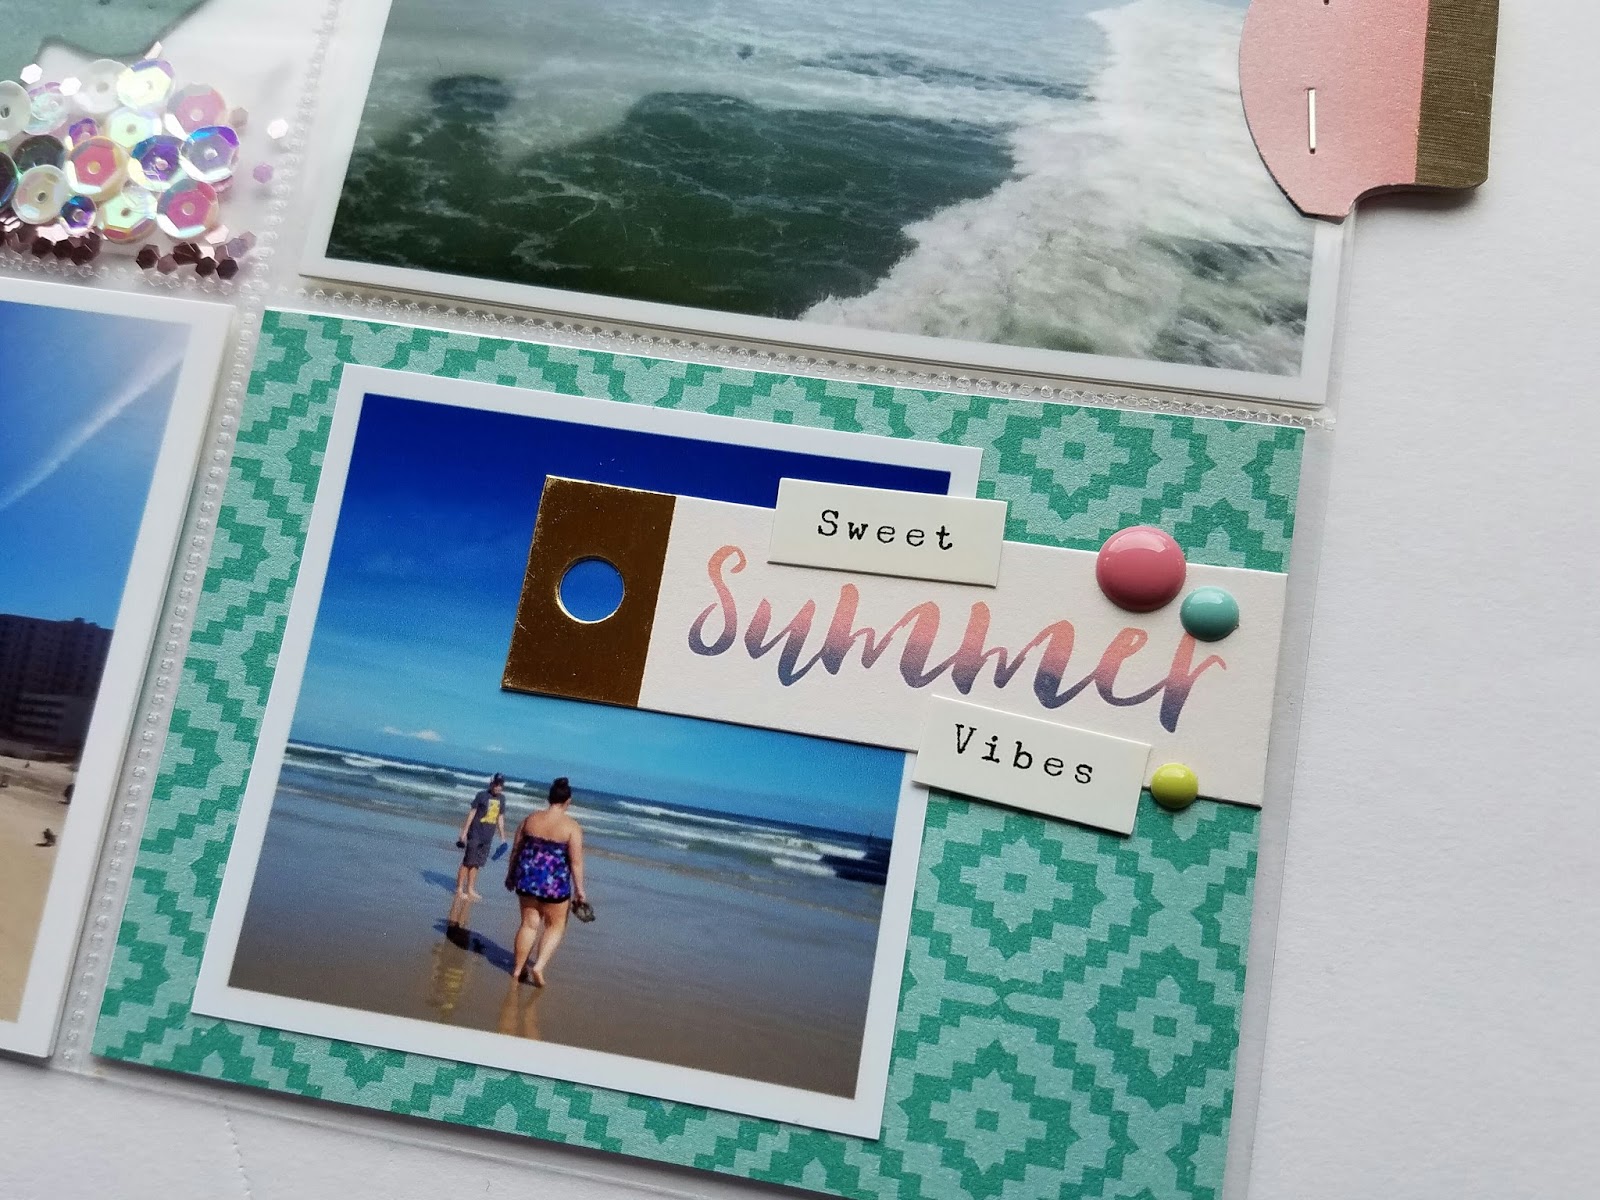
Onto the back side of the 1st insert, which documents our visit to Disney Springs...
On to the front of the 2nd insert. These photos are from our stay at Disney's Animal Kingdom Lodge. We are frequent Disney visitors, but this was our first stay at this resort.
I shifted to a different page protector arrangement for this insert, because I had a few vertical 4x6 photos I wanted to use.
Above, you can see a close up of some of the details that I've repeated throughout the layout- a small square photo with a die cut shape, cluster of enamel dots and a bit of gold stitching.
Here's the back of the 2nd insert, documenting a day hopping around Disney parks. We made a short stop at Animal Kingdom and Hollywood Studios, before spending the remainder of day at Magic Kingdom.
I printed a strip of photos of the park icons we visited, and just added some simple washi tape strips, along with more puffy gold words.
I used one of the freebie printable cards from Project Mouse, and just added a few heart stickers and some simple journalling. The watercolor pattern mixed with the Walt & Mickey silhouette is perfection!
The card above turned out to be one of my favorites from this layout. I used a pink journal card from the Project Mouse collection as a base, and just added a cluster of heart and word stickers, a glittery geo tag and a bit of stitching. Super simple, but I love it.
On to the last insert. Here is the front, documenting our visit to Seaworld...
Above, I cut the "sea" tag from the Oasis vellum sheet, and layered it with some gold letters that I handcut from some leftover words to spell out "world" and again, stitched it in place.
Another confetti pocket...
On to the back of the 3rd insert, documenting our visit to the GORGEOUS Hammock Beach Resort...
The pink filler card above is yet another from the Project Mouse collection. I added a wooden & enamel button from the Crate Paper "Little You" collection, which I adhered to the top of my page protector.
We're in the home stretch! Finally, on to the last right-side page...
And.... that's all she wrote folks! Thanks for stopping by!
Showing posts with label Vacation. Show all posts
Saturday, April 1, 2017
Thursday, September 8, 2016
Project Life 2016 | Beach Vacation
Settle in for a marathon post peeps! Today I'm sharing a week in my Project Life album that documents our beach vacation from earlier this summer. I constantly see people question how to document a big event, like a vacation, within their Project Life album. Or if they even SHOULD. Personally, I'd never want to leave a big hole in what is otherwise a summary of our year, so I always include it. I just add smaller inserts as needed.
For this layout I gathered supplies with a fun tropical color scheme. I started with the Simple Stories "You Are Here" collection and purchased the 6x6 paper pad, card pack (which includes some die cut pieces), wood veneer and cardstock sticker sheet from that collection. I also purchased a handful of acrylic pieces from Color Cast Designs, from their May release. The colors and theme were just PERFECT! As I went along, I also pulled in a few things from my stash- alpha stickers, washi, enamel dots and some additional acrylic pieces.
So without further ado, here's our 2016 beach vacation. This spread includes a traditional Design A left and right page as my "bookends" to the week, plus 5 inserts to summarize each day.
Here's the full left page, which documents our travel and arrival in Myrtle Beach. The title card here was simple, layering some cardstock stickers from the Simple Stories collection, a strip of washi and an acrylic piece from Color Cast Designs. The wood veneer alpha stickers are from Bo Bunny.
Below, a small photo I grabbed off my daughter's Snapchat, and on the right, a simple strip of gold vellum and wood veneer hold our room key. I think that veneer disc is from an old Citrus Twist kit.
As I mentioned, this layout includes a bunch of inserts... 5 to be exact. I used 3" square pocket pages for all of the inserts. To the edge of each, I added a tab (punched from the Simple Stories), labeled with a day of the week roller stamp from Studio Calico. Each day of our vacation is documented on the front of an insert, with our evening activities on the back side. I love how these look stacked up in the album!
Insert #1 front (Sunday daytime)...
I also added a white circle acrylic piece to indicate each day of the week. Those pieces are from Elle's Studio, and can be found here.
Below, one of the many acrylic pieces from Color Cast Designs, I've used throughout the layout...
Insert #1 back (Sunday evening)...
I used a few of the Simple Stories wood veneer pieces throughout the layout. For each piece, I used a wood stain marker to stain the wood to a deeper tone. These pens can be found at Home Depot type stores, and are used to "touch-up" scratches in wood cabinetry or furniture. I love the deep, rich color the wood veneer has once it is stained!
Insert #2 front (Monday daytime)...
My favorite element from this insert is this little pocket...
I saved a bit of sand from the beach along with some of the tiniest shells ever, and added them to one of the pockets, backed by a piece of vellum. I also added a couple of the super adorable acrylic fish from Color Cast Designs, and then sealed the pocket shut with my Fuse tool.
Insert #2 back (Monday evening)...
Insert #3 front (Tuesday daytime)...
Insert #3 back (Tuesday evening)...
Insert #4 front (Wednesday daytime)...
Below, another stained wood veneer piece. Most paper and cards used throughout the layout are from Simple Stories, but this one behind the flamingo is from Elle's Studio.
Insert #4 back (Wednesday evening)...
The card pack from Simple Stories included a handful of 2" square cards. I love these little journalling ones, in the card below, and used several throughout the layout, layered with washi, stickers, wood veneer and enamel dots.
Those sunset photos are some of my favorite from the week. The colors were just amazing, changing every few minutes! I really love the look of square pocket pages, but sometimes a photo just can't be cropped. When thay happens, I adjust the borders when I'm editing, so that I can stretch the photo over 2 squares!
Insert #5 front (Thursday daytime)...
Again, more acrylic from Color Cast Designs. I loved the "sun" "sand" and "surf" script pieces together, so I choose to use them all one 1 insert.
That wood veneer anchor is also from Color Cast Designs. I stained it just as I did the other pieces in the layout.
Insert #5 back (Thursday evening)...
And finally, here is the full right side page, which documents a few miscellaneous things that didn't fit in elsewhere, plus our departure and travel home.
The 3x4 card below is a leftover from a Citrus Twist kit.
I love the simplicity this full 4x6 photo with some alpha and acrylic. A great way to finish off the layout.
Here's a collage of all those inserts pages together!
And...Phew! That's about it for this layout!
If you are contemplating documenting a vacation or big event of your own and feeling overwhelmed, check out this post, where I've previously shared my process.
Thanks for stopping by!
For this layout I gathered supplies with a fun tropical color scheme. I started with the Simple Stories "You Are Here" collection and purchased the 6x6 paper pad, card pack (which includes some die cut pieces), wood veneer and cardstock sticker sheet from that collection. I also purchased a handful of acrylic pieces from Color Cast Designs, from their May release. The colors and theme were just PERFECT! As I went along, I also pulled in a few things from my stash- alpha stickers, washi, enamel dots and some additional acrylic pieces.
So without further ado, here's our 2016 beach vacation. This spread includes a traditional Design A left and right page as my "bookends" to the week, plus 5 inserts to summarize each day.
Here's the full left page, which documents our travel and arrival in Myrtle Beach. The title card here was simple, layering some cardstock stickers from the Simple Stories collection, a strip of washi and an acrylic piece from Color Cast Designs. The wood veneer alpha stickers are from Bo Bunny.
Below, a small photo I grabbed off my daughter's Snapchat, and on the right, a simple strip of gold vellum and wood veneer hold our room key. I think that veneer disc is from an old Citrus Twist kit.
As I mentioned, this layout includes a bunch of inserts... 5 to be exact. I used 3" square pocket pages for all of the inserts. To the edge of each, I added a tab (punched from the Simple Stories), labeled with a day of the week roller stamp from Studio Calico. Each day of our vacation is documented on the front of an insert, with our evening activities on the back side. I love how these look stacked up in the album!
Insert #1 front (Sunday daytime)...
I also added a white circle acrylic piece to indicate each day of the week. Those pieces are from Elle's Studio, and can be found here.
Below, one of the many acrylic pieces from Color Cast Designs, I've used throughout the layout...
Insert #1 back (Sunday evening)...
I used a few of the Simple Stories wood veneer pieces throughout the layout. For each piece, I used a wood stain marker to stain the wood to a deeper tone. These pens can be found at Home Depot type stores, and are used to "touch-up" scratches in wood cabinetry or furniture. I love the deep, rich color the wood veneer has once it is stained!
Insert #2 front (Monday daytime)...
My favorite element from this insert is this little pocket...
I saved a bit of sand from the beach along with some of the tiniest shells ever, and added them to one of the pockets, backed by a piece of vellum. I also added a couple of the super adorable acrylic fish from Color Cast Designs, and then sealed the pocket shut with my Fuse tool.
Insert #2 back (Monday evening)...
Insert #3 front (Tuesday daytime)...
Insert #3 back (Tuesday evening)...
Insert #4 front (Wednesday daytime)...
Below, another stained wood veneer piece. Most paper and cards used throughout the layout are from Simple Stories, but this one behind the flamingo is from Elle's Studio.
Insert #4 back (Wednesday evening)...
The card pack from Simple Stories included a handful of 2" square cards. I love these little journalling ones, in the card below, and used several throughout the layout, layered with washi, stickers, wood veneer and enamel dots.
Those sunset photos are some of my favorite from the week. The colors were just amazing, changing every few minutes! I really love the look of square pocket pages, but sometimes a photo just can't be cropped. When thay happens, I adjust the borders when I'm editing, so that I can stretch the photo over 2 squares!
Insert #5 front (Thursday daytime)...
Again, more acrylic from Color Cast Designs. I loved the "sun" "sand" and "surf" script pieces together, so I choose to use them all one 1 insert.
That wood veneer anchor is also from Color Cast Designs. I stained it just as I did the other pieces in the layout.
Insert #5 back (Thursday evening)...
And finally, here is the full right side page, which documents a few miscellaneous things that didn't fit in elsewhere, plus our departure and travel home.
The 3x4 card below is a leftover from a Citrus Twist kit.
I love the simplicity this full 4x6 photo with some alpha and acrylic. A great way to finish off the layout.
Here's a collage of all those inserts pages together!
And...Phew! That's about it for this layout!
If you are contemplating documenting a vacation or big event of your own and feeling overwhelmed, check out this post, where I've previously shared my process.
Thanks for stopping by!
Subscribe to:
Posts (Atom)


